Amazon Web Services (AWS) provides an on-demand solution for storing and processing data for individuals and enterprises alike.
Keeping data accessible through inexpensive, reliable and unlimited cloud storage, like AWS, makes financial sense for a lot of organizations. However, the move to a cloud storage-only model can create challenges with performance, integration with legacy systems and security, amongst others.
Enter the hybrid cloud storage model. A hybrid cloud storage environment spans both on-premises and in cloud storage. A hybrid cloud using AWS provides the flexibility to keep high performance storage on-premises while utilizing the limitless capacity of AWS cloud for secondary storage.
With Leonovus Smart Filer, setting up an AWS hybrid cloud environment is faster and easier than ever. Installed and configured in minutes, Smart Filer works by identifying and tiering infrequently accessed on-premises data to the cloud, resulting in primary storage capacity and cost savings while maintaining a seamless end-user experience.
Learn how you can configure an AWS hybrid cloud environment quickly using Smart Filer by following the steps below.
Configuring AWS for a Smart Filer hybrid cloud
To use Amazon S3, you need an AWS account. If you don't already have one, you'll be prompted to create one when you sign up for Amazon S3.
Creating an S3 bucket
Sign in to the AWS Management Console and open the Amazon S3 console at https://console.aws.amazon.com/s3/.

Create a new bucket, following the guidelines outlined under Rules for Bucket Naming in the Amazon Simple Storage Service Developer Guide.
Create Access Keys
In order to access the S3 bucket, Smart Filer must authenticate itself to Amazon S3 using an access key pair consisting of an access key ID and secret access key.
Create an access key pair by following the steps outlined under Managing Access Keys for IAM Users in the Amazon Web Services IAM User Guide.
For additional information regarding AWS features and configuration options, please refer to the AWS documentation: https://docs.aws.amazon.com/index.html
Deploy and configure Smart Filer to use AWS S3 object storage
Follow the steps below to configure Smart Filer to use AWS S3 object storage:
Download and install Smart Filer
Get started with Smart Filer by downloading the Smart Filer 30-day free trial and following the steps outlined in the Leonovus Smart Filer Deployment and Administration Guide to install and configure the Smart Filer virtual appliance.
Log into the Smart Filer Administration web interface. The Managed Shares page is displayed.
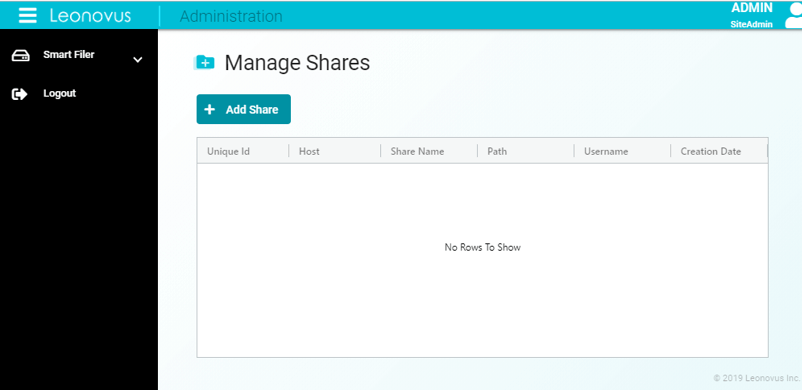
Create an AWS S3 Storage Provider
To use AWS S3 as a target for Smart Filer, you must create a Storage Provider and then configure it as the target of the Managed Shares you want to offload. Smart Filer will offload files to a specified bucket on that storage provider.
On the Providers tab, select “Add provider”.
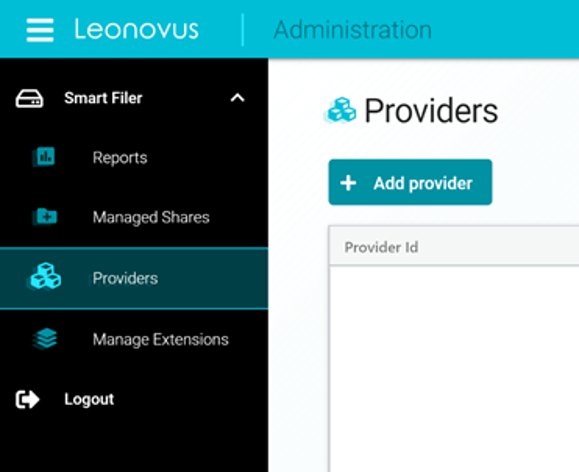
The “Create a new provider” dialogue is shown:
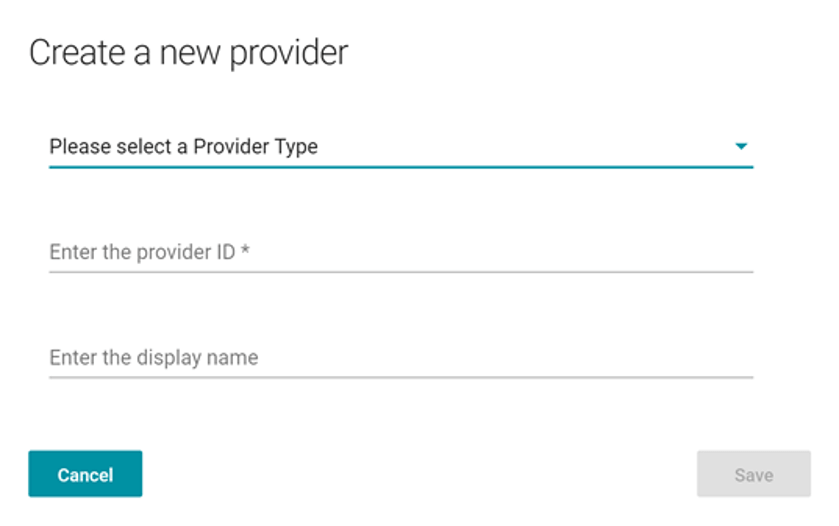
Select Amazon S3 from the “Provider Type” drop-down.
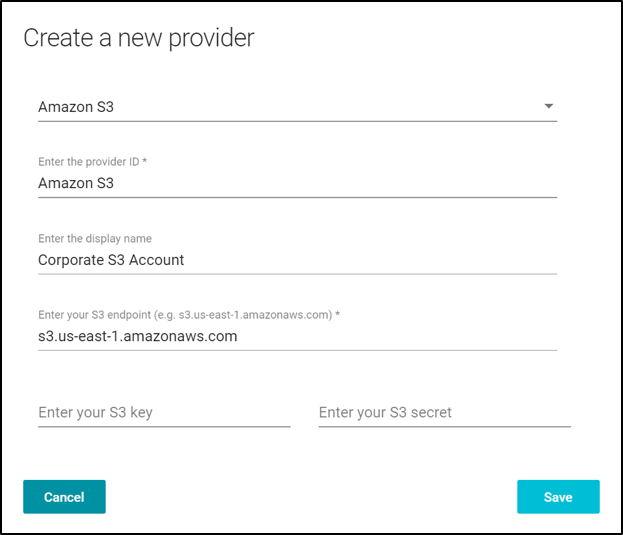
Complete the other fields as specified:
Provider ID is the unique id that will be used internally. This name cannot include spaces or special characters.
Display Name is a descriptive name that will appear in the provider dropdown when configuring the target of a Managed Share. The Display Name can include spaces and special characters.
S3 endpoint – enter the AWS S3 service URL corresponding to the region in which you want cold data stored (See AWS Service Endpoints in the AWS General Reference Guide for a list of endpoints)
S3 key – enter your AWS S3 Access Key ID
S3 secret – enter your AWS S3 Secret Key
For example:
Add a Smart Filer Managed Share
The first step is to add an SMB network file share that will be used for data discovery and offload operations.
On the Managed Shares tab, click Add Share

Enter the appropriate SMB mount information for the network file share. For example:
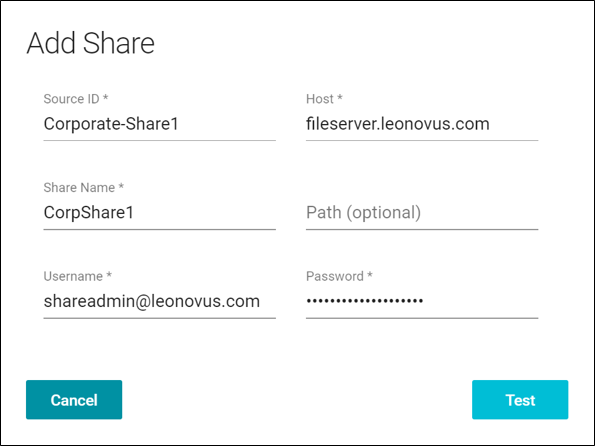
SourceID is an administrator-defined identifier for the Managed Share.
Host can be either an IP address or a domain name. To see the network shares you currently have mapped, use the command “net use” from a command prompt.
Share Name is the name of the SMB share.
Path is optional and can be any existing subdirectory under the root of the share. If you configure a path, the Smart Filer will only scan and manage files under that path.
Username and Password are the Windows credentials for accessing the network share.
Selecting the Test button will initiate a test connection to the network file share and confirm the ability to successfully connect. Once a connection is confirmed, the Save button is displayed allowing the share configuration to be saved.

Configuring an AWS Hybrid Cloud Managed Share
Once a SMB network file share has been added as a Managed Share, you can configure it by adding a Target and a Plan. The Leonovus Smart Filer then manages the share and offloads files to the target.
From the Managed Share list, select the share you configured and press the Edit button.
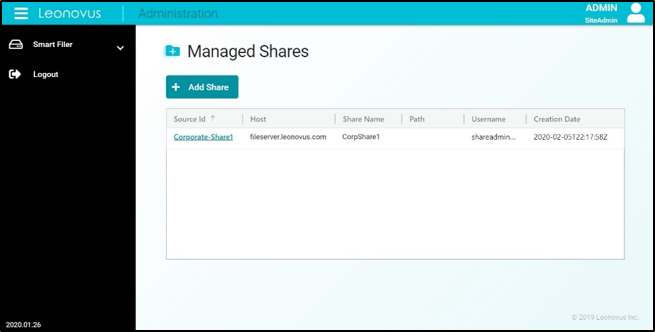
Configuring the Target
Select the Target Details tab:
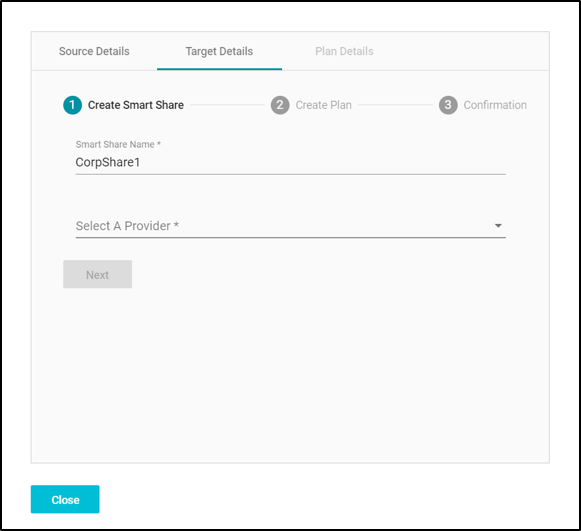
A Target is the combination of a Storage Provider and a container. Therefore, select the Amazon S3 provider you’ve configured and the bucket you created in your S3 account.
In the following example, we specify the storage provider whose display name is “Amazon S3”, and an S3 bucket called “corpshare1-target-bucket”.
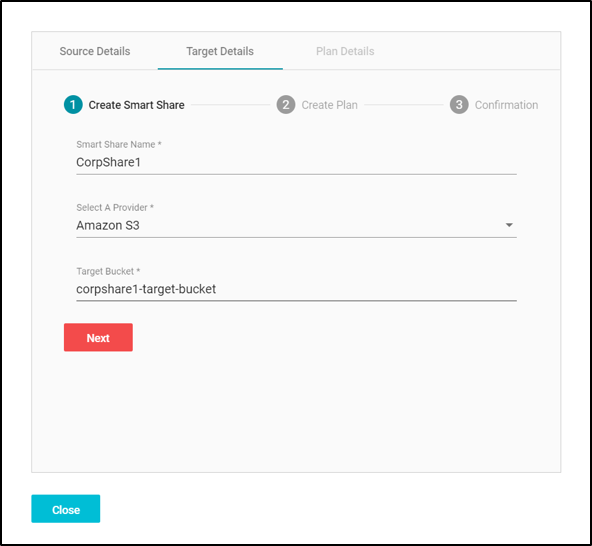
Once all the details have been added, select Next which verifies the connectivity and permissions to write to the Target. If the connection test is successful you will move to the Plan Details tab where you can set your offload policies and schedule.
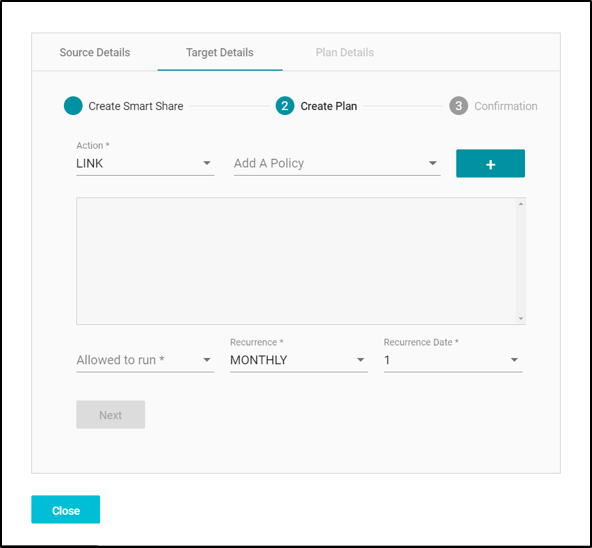
You have now successfully set up an AWS hybrid cloud with Smart Filer.
For more details, consult the Leonovus Smart Filer Deployment and Administration Guide.
Need some help? Get in touch and our support staff will be happy to assist you.
